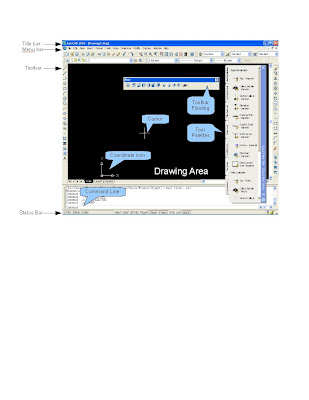
NOTE : AutoCAD is not case sensitive package, so you can write your command in any case. The command is fired by pressing enter or spacebar key.
Step 1 - Setting up a proper unit :
AutoCAD® does not use a predefined system of unit measure such as meters or inches. For example, a distance of one unit may represent one centimeter, one foot, or one mile in real-world units. Before we begin drawing, it's better to decide what distance one unit will represent, and then create our drawing with that convention.
Format menu : Units
Command line: units
This command defines the unit and angle formats.
For the sake of simplicity and convenience we will take decimal as the default units for our initial drawings.
Step 2 - Checking our drawing Limits :
Format menu : Drawing Limits
Command : limits
Reset Model space limits:
Specify lower left corner or [ON/OFF] <0.0000,0.0000>:
Specify upper right corner <12.0000,9.0000>:
This command sets and controls the limits of the drawing boundaries and grid display in the current Model or layout tab .
Make sure your drawing limits are same as shown above otherwise just type in the default 0,0 for lower left corner and 12,9 for the upper right corner.
This is the default area in which we will draw our drawings.
Step 3 - Turning on the grid display :
The grid is a rectangular pattern of dots that extends over the area specified as the drawing limits. The grid helps us to align objects and visualize the distances between them.
Command: Grid
Specify grid spacing(X) or [ON/OFF/Snap/Aspect]
or press F7 Function Key
or pick GRID tab from Status Bar
When we execute this command the lower left portion of the drawing area will display the rectangular pattern of dots. The default grid unit is .5
Step 4 - Zooming the drawing limits area :
View menu : Zoom
Command : Zoom
Specify corner of window, enter a scale factor (nX or nXP), or
[All/Center/Dynamic/Extents/Previous/Scale/Window]
This option Zooms to display the entire drawing in the current viewport.
NOTE : Try to avoid using the scroll button of your mouse as it zooms the entire drawing dynamically.
With these simple 4 steps we are ready to draw our first drawing.

